1. Find an interesting existing Alt+Ctrl Interface
Fireplay by Emilie Breslavetz
The alternative controller is made for playing Little Inferno with real fire. It uses a flame sensor to detect fire. The player uses matches and lycopodium powder to control the fire.
I picked this example since I did not think about the possibility of fire as a game controller… Probably will not be using it but this reminded me that there are a lot of different types of sensors I don’t know about.
https://playful-machines.com/projects/fireplay/
https://shakethatbutton.com/fireplay/
2. Come up with a concept for your own Alt+Ctrl Interface
Experiments with a 3D magnetic sensor (TLV493D-A1B6)
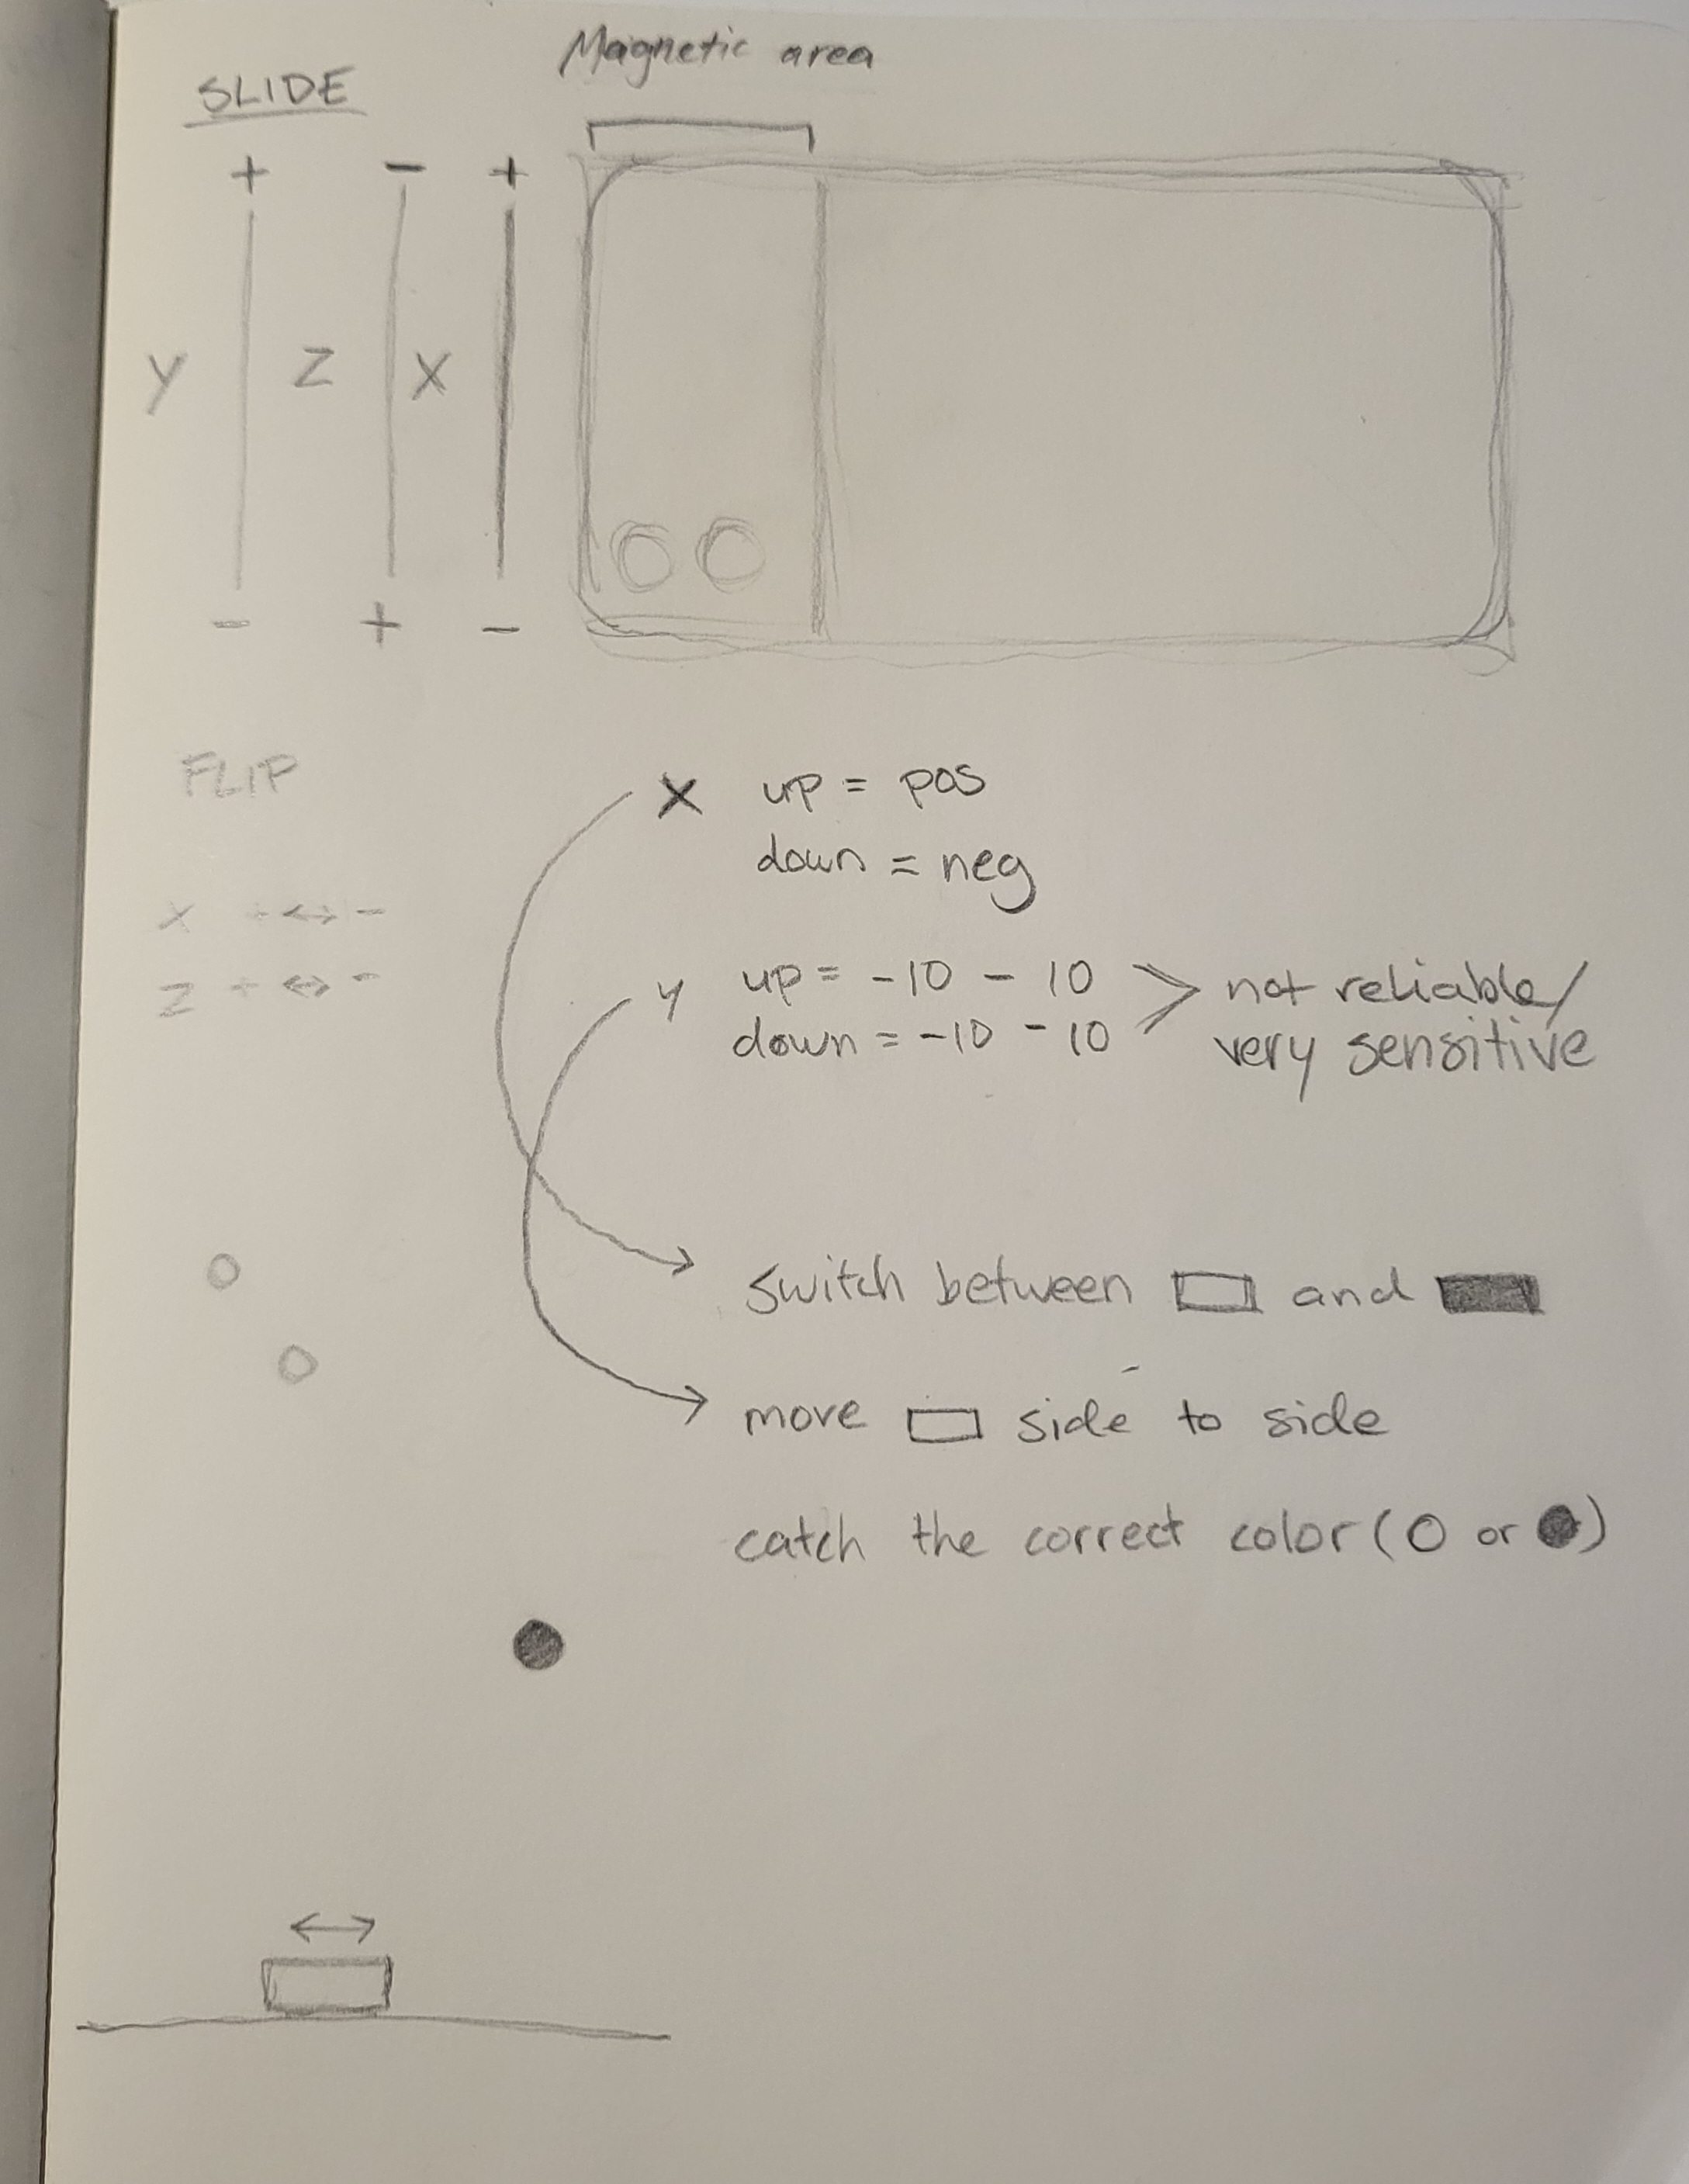
I started by finding a magnet (my phone) and moving it around the sensor. It was hard to fully understand how the sensor tracked x, y and z-direction but I was able to find a few movements that gave me consistant results with the sensor. I noticed that it’s easier to move the sensor than the magnet.
1 - By moving the sensor linearly on the magnetic area of my phone, I got sliding values.
2 - By flipping the sensor, the X values would change from positive to negative.
Game test
To test the sensor in a game, I designed and coded a simple game.
Video of playing the game with my phone and a whiteboard magnet
The game was designed to work with my phone but I noticed that it worked with the whiteboard magnet too (in this case the Y values are defined by the distance of the sensor to the magnet). However, the magnet sensor is very sensitive and the game is currently optimised for my phone’s magnet. The values/range should be optimized separately for different magnets for a better play experience.
Connecting Arduino to Processing
I used these tutorials to figure out how to connect the sensor data to processing. I also asked ChatGPT to help me with converting the serial data to floats.
https://learn.sparkfun.com/tutorials/connecting-arduino-to-processing/all
https://www.arduino.cc/education/visualization-with-arduino-and-processing/
Arduino code
#include <Tlv493d.h>

// Tlv493d Opject
Tlv493d Tlv493dMagnetic3DSensor = Tlv493d();

void setup() {
  Serial.begin(9600);
  while(!Serial);
  Tlv493dMagnetic3DSensor.begin(Wire1);
}

void loop() {
  Tlv493dMagnetic3DSensor.updateData();
  delay(100);

  float xValue = Tlv493dMagnetic3DSensor.getX();
  float yValue = Tlv493dMagnetic3DSensor.getY();

  Serial.print(xValue);
  Serial.print(",");
  Serial.println(yValue);

  delay(10);
}
Processing code
import java.util.Iterator; // Import Iterator class for iterating over ArrayList
import processing.serial.*; // Import Serial library for serial communication with Arduino
Serial myPort;  // Create object from Serial class
float xValue, yValue;

class Enemy // class description for enemy (falling circles)
{
  float x, y, speed; // Enemy location and speed
  color a = color(203, 144, 232);
  color b = color(127, 212, 188);
  int t; // Used for picking and identifying the color of each enemy

  Enemy(float x_, float y_) //Constructor for creating an enemy
  {
    x = x_;
    y = y_;
    speed = 1;
    t = int(random(2)); // Assign a random color to the enemy (0 or 1)
  }

  color getColor() { // To know which color was picked for each enemy
    if (t == 1) {
      return a;
    } else {
      return b;
    }
  }

  void fall() // How the enemies move
  {
    y += speed;
  }

  void display() // How the enemies look
  {
    if (t == 1)
    {
      fill(a);
    } else
    {
      fill(b);
    }
    ellipse(x, y, 20, 20);
  }
}

ArrayList<Enemy> enemies = new ArrayList<Enemy>(); //Array list for holding the enemies
int state = 0; // Color state of the player
color c = color(203, 144, 232);
color d = color(127, 212, 188);
int points = 0; // Count points

void setup()
{
  fullScreen();
  myPort = new Serial(this, "COM4", 9600);  // Connect to Arduino using the specified port and baud rate

  // Initialize variables
  xValue = 0.0;
  yValue = 0.0;
}

void draw()
{
  if (myPort.available() > 0) {
    String data = myPort.readStringUntil('\n');  // Read data until newline character
    if (data != null) {
      data = data.trim(); // Remove leading/trailing white spaces
      String[] values = split(data, ','); // Split the data into an array using a comma as the separator
      if (values.length >= 2) {
        xValue = float(values[0]); // Convert 1st value to float
        yValue = float(values[1]); // Convert 2nd value to float
      }
    }
  }

  float mappedX = map(yValue, -10, 10, 0, width); // Map the sensor values to the width
  background(0);
  fill(250);
  textSize(24);
  text("X: " + xValue, 20, 50);
  text("Y: " + yValue, 20, 100);
  textSize(40);
  text(points, 20, 170);

  if (xValue > 0) // Define the color state of the player based on xValue
  {
    state = 1;
    fill(c);
  } else
  {
    fill(d);
    state = 0;
  }

  rect(mappedX, height-50, 200, 10); // Draw the player

  if (frameCount % 240 == 0) // New enemy every 4 seconds
  {
    enemies.add(new Enemy(random(10, width-10), -10)); //where enemies start
  }
  Iterator<Enemy> it = enemies.iterator(); // Create an iterator for the ArrayList of enemies
  while (it.hasNext())
  {
    Enemy enemy = it.next(); // Get the next enemy from the iterator
    enemy.fall(); // Make the enemy fall down
    enemy.display(); // Display the enemy on the screen
    color f = enemy.getColor(); // Get the color of the enemy
    if (enemy.y > height)
    {
      //exit(); // Comment out for ending the sketch if an enemy reaches y = width
      points = 0; // If the player misses an enemy, points reset to zero
    }
    if (enemy.y + 10 >= height - 50 && enemy.x + 10 >= mappedX && enemy.x <= mappedX + 200)
    {
      if ((state == 1 && f == enemy.a) || (state == 0 && f == enemy.b))
      {
        it.remove(); // Remove the enemy that hits the rectangle if the color matches
        points++; // Increase the player's score
      }
    }
  }
}


